Development
Environment setup
Typically on Ubuntu (but should work on Windows).
1. Install virtual environment
Using qgis-venv-creator (see this article) through pipx (sudo apt install pipx):
pipx run qgis-venv-creator
Old school way:
# create virtual environment linking to system packages (for pyqgis)
python3 -m venv .venv --system-site-packages
source .venv/bin/activate
2. Install development dependencies
# bump dependencies inside venv
python -m pip install -U pip
python -m pip install -U -r requirements/development.txt

# install git hooks (pre-commit)
pre-commit install
Dedicated QGIS profile
It’s recommended to create a dedicated QGIS profile for the development of the plugin to avoid conflicts with other plugins.
From the command-line (a terminal with or OSGeo4W Shell):
# Linux
qgis --profile plg_profile_manager
# Windows - OSGeo4W Shell
qgis-ltr --profile plg_profile_manager
# Windows - PowerShell opened in the QGIS installation directory
PS C:\Program Files\QGIS 3.40.4\LTR\bin> .\qgis-ltr-bin.exe --profile plg_profile_manager
Then, set the
QGIS_PLUGINPATHenvironment variable to the path of the plugin in profile preferences: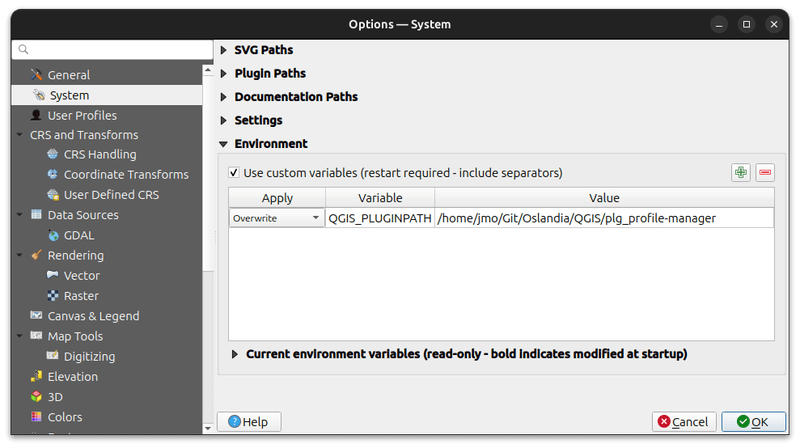
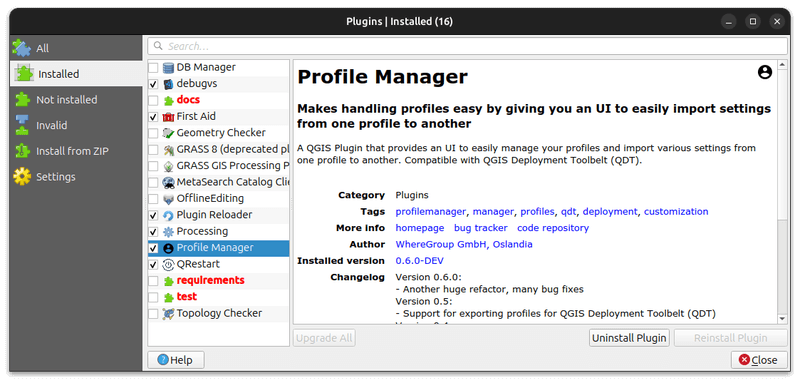
Finally, enable the plugin in the plugin manager (ignore invalid folders like documentation, tests, etc.):